We Were Here Tomorrow Chemical Puzzle: Resin Solution
Solve the We Were Here Tomorrow chemical puzzle with the correct resin recipe, nozzle order, reset steps, and co-op tips to keep your lab progress moving.
Jump to
Chemical Puzzle Solution: The Correct Resin Recipe
The We Were Here Tomorrow chemical puzzle solution is Styrene → Acrylonitrile → Butadiene → Styrene. Getting that order right completes the resin mixture and lets you continue through the laboratory machinery. If the We Were Here Tomorrow chemical puzzle keeps rejecting your mixture, check that you added Styrene at both ends and used equal portions of the two middle ingredients.
Here is the complete sequence using the numbered dispensing positions:
| Step | Chemical | Nozzle |
|---|---|---|
| 1 | Styrene | No. 4 |
| 2 | Acrylonitrile | No. 3 |
| 3 | Butadiene | No. 1 |
| 4 | Styrene | No. 4 |
Keep that table handy while moving the container. The chemical names are easy to stumble over during a conversation, especially when one explorer is reading instructions while the other is waiting beneath a dispenser.
Complete the mixture step by step
- Clear any unsuccessful mixture. Use the suction mechanism to empty the container before starting the correct recipe.
- Position the container beneath No. 4. Dispense the opening portion of Styrene.
- Move beneath No. 3. Add Acrylonitrile.
- Move beneath No. 1. Add an equal portion of Butadiene.
- Return beneath No. 4. Add Styrene again to finish the sequence.
- Activate the processing mechanism. Check that the completed mixture is accepted before continuing.
Make the container’s position part of every callout during the We Were Here Tomorrow chemical puzzle. Say the ingredient, move beneath its outlet, confirm alignment, and then dispense. This keeps the player at the controls from operating the machine while the container is still traveling between nozzles.
The important detail is the repeated ingredient. You have three chemical names but four additions. Adding each chemical once leaves the recipe incomplete, even when Acrylonitrile and Butadiene are present in the correct proportions.
After processing succeeds, continue through the laboratory route. The Green Key Card comes later, after the computer passage and 3D printer puzzle.
Official page: We Were Here Tomorrow (store.steampowered.com)
Understand the Recipe and Coordinate Both Players
The We Were Here Tomorrow chemical puzzle splits its information and controls between the explorers. The small explorer handles the movable container beneath the dispensing apparatus. The normal-sized partner reads the recipe and operates the surrounding equipment.
Before pouring anything, have both players identify what they can interact with. The chemical labels alone tell you which ingredients exist; the recipe tells you how to combine them.
What the recipe means
The instructions establish three requirements:
- Acrylonitrile goes before Butadiene.
- Those two ingredients need equal portions.
- Styrene goes before and after that pair.
Read the middle ingredients as one ordered pair, then put Styrene on either side:
Styrene → [Acrylonitrile → Butadiene] → Styrene
That grouping makes the sequence easier to remember. Keep the two Styrene additions separate in your callouts, because they happen at different points in the process.
Match chemicals to nozzle numbers
The station has five numbered positions, with repeated chemicals across the outlets.
| Nozzle | Chemical |
|---|---|
| No. 1 | Butadiene |
| No. 2 | Styrene |
| No. 3 | Acrylonitrile |
| No. 4 | Styrene |
| No. 5 | Butadiene |
Use 4 → 3 → 1 → 4 for the sequence above. Even though Styrene and Butadiene each appear at multiple positions, sticking with those numbered outlets keeps both players working from the same instructions.
Read the labels when establishing your positions. Calling an outlet “the one on my left” can create confusion when your partner views the apparatus from another angle.
Use short, specific callouts
Coordinate the We Were Here Tomorrow chemical puzzle with a simple exchange:
- Container player: “Under four. Ready for Styrene.”
- Controls player: “Dispensing Styrene.”
- Container player: “Added. Moving to three.”
Repeat that pattern for each addition. Confirm that liquid actually enters the container before announcing the next ingredient.
Say the full chemical names when checking the recipe, then use nozzle numbers during movement. This gives you a clear way to catch mistakes without repeating “Acrylonitrile” throughout every adjustment.
Before the final processing input, read back the completed order together. That check can catch a missing finishing portion while both players still remember their actions.
Reset a Failed Mixture and Fix Dispensing Problems
A failed attempt at the We Were Here Tomorrow chemical puzzle usually calls for checking the recipe, the container’s contents, and its position beneath the outlets.
 Image: PlayStation Store
Pause after the failure feedback. Repeating the processing input with the same contents does not correct an ingredient added in the wrong order.
| Problem | What to check | Next action |
|---|---|---|
| You added each chemical once | The recipe needs Styrene twice | Empty the container and perform all four additions |
| Butadiene went in before Acrylonitrile | The middle ingredients have a required order | Restart with Acrylonitrile before Butadiene |
| The middle portions differ | Acrylonitrile and Butadiene must be equal | Clear the attempt and dispense equal portions |
| An outlet operates without filling the container | The container may be misaligned | Adjust its position beneath the outlet |
| An earlier experiment remains inside | Old contents are still part of the mixture | Use suction before beginning again |
Empty the container before retrying
Use the apparatus that sucks the liquid out of the container. Once it is empty, return to the opening Styrene step.
Treat each retry as a complete sequence. Avoid trying to repair an already incorrect order by adding extra chemicals afterward. Emptying the container gives both players a clear starting point and removes uncertainty about what is inside.
Have one player announce “container empty” before the partner begins operating the dispensers again. Then count through the four additions aloud.
Check alignment before dispensing again
The container must sit beneath the selected outlet for the liquid to enter it. If the dispenser operates without adding liquid, adjust the container and coordinate another dispensing action.
Watch the result before moving away. An activated control and a successful addition are separate things to check during this puzzle.
If you lose track of whether an ingredient entered the container, stop and compare what each player saw. Use the suction mechanism to restart when the contents are unclear.
Keep the recipe separate from the apparatus
One explorer can understand the recipe perfectly while the other is still learning how to position the container. Give each task its own confirmation.
First agree on the chemical order. Then identify the numbered positions. Finally, work through the movement and dispensing actions.
This makes troubleshooting more precise: you can check whether the problem happened while reading the recipe, selecting an outlet, or collecting the liquid.
Floppy Disk Puzzle: Unlock the Computer Passage
After completing the We Were Here Tomorrow chemical puzzle, the miniature route continues toward a computer passage with oversized floppy disk barriers.
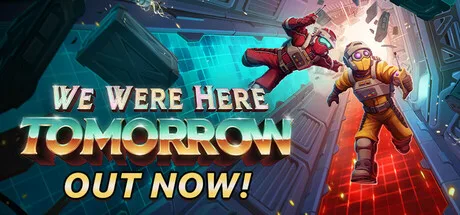 Image: Steam / Total Mayhem Games
You also need to deal with the save disk. When the outside monitor requests it, return to the size-changing chamber, have your partner restore your normal size, and insert the disk into the outside equipment. Coordinate another shrinking cycle to resume the miniature route.
The two numbered barriers use separate direction-matching puzzles.
| Barrier | Dial movement | Directions to communicate |
|---|---|---|
| Floppy Disk Door 1 | 90-degree increments | Up, right, down, left |
| Floppy Disk Door 2 | 45-degree increments | Cardinal directions and diagonals |
Open the first floppy disk door
- Have the explorer viewing the target indicators read all four directions in order.
- Match those directions on the corresponding controls.
- Account for the delay between releasing a control and its indicator stopping.
- Check for the accepted blue indicators.
- Continue through Door 1 once it opens.
An incorrect indicator can turn red and reset the sequence. Read the current target directions again after a reset.
Coordinate before starting the timed interaction. Agree on the reading order so neither player has to ask which dial a direction belongs to while the mechanism is running.
Open the second floppy disk door
The next mechanism adds diagonal positions. Distinguish upper-left, upper-right, lower-left, and lower-right clearly.
Read the second set independently rather than carrying over the first combination. Match all four indicators, then continue through the opened barrier toward the 3D printer.
The reward for completing these controls is access through the computer passage. Keep moving toward the printer to finish the laboratory’s access-card objective.
3D Printer Puzzle: Create the Green Key Card
The printer puzzle pairs directional controls with a 4×4 light grid. One explorer moves the selected position and presses a central button, while the partner watches the grid and guides the changes.
The blinking red indicator marks the position currently under control. The solid lights help identify the pattern you need to reproduce.
| Stage | Action | Confirmation |
|---|---|---|
| Establish orientation | Move the indicator once and describe the result | Both players agree on the movement directions |
| Select a position | Guide the indicator to a light that needs changing | The blinking indicator reaches that position |
| Change the light | Press the central button | The selected position changes state |
| Finish the pattern | Repeat for the remaining required changes | The printer activates |
| Collect the result | Retrieve the printed item | You obtain the Green Key Card |
Establish directions before changing lights
Test a movement and have your partner say where the indicator went. Your views of the equipment can make the controls feel reversed.
Once you agree on the orientation, keep using that same frame of reference. Give one movement at a time when approaching a position that needs changing.
Toggle each required position
- Identify a light that differs from the target pattern.
- Move the blinking indicator onto that position.
- Press the central button to change its state.
- Have the observing player confirm the result.
- Repeat until the displayed pattern matches.
Moving the indicator only selects a position. Remember the central input whenever a light needs changing.
When the pattern is complete, the printer produces the Green Key Card. Collect it, return to the size-changing chamber, and coordinate with your partner to become normal-sized again.
Bring the card to the earlier green access panel. Opening that door lets both explorers continue toward the prototype equipment, completing the laboratory route that included the resin station.
FAQ
What is the We Were Here Tomorrow chemical puzzle solution?
Add Styrene, Acrylonitrile, Butadiene, and Styrene, in that order. Use nozzle sequence 4 → 3 → 1 → 4, keep the Acrylonitrile and Butadiene portions equal, and activate processing after the final addition.
Why does the resin mixture fail with all three chemicals inside?
The recipe requires four additions. Styrene must go in before Acrylonitrile and again after Butadiene. Check the middle ingredients’ order and equal portions, too.
How do you reset the chemical mixture?
Use the suction mechanism to empty the container. Begin again with Styrene, confirming each addition before moving to the next outlet.
Does completing the chemical puzzle give you the Green Key Card?
The chemical puzzle advances the laboratory machinery. To obtain the Green Key Card, continue through the floppy disk barriers and complete the 3D printer’s light-grid pattern.
Continue with
 We Were Here Tomorrow Circuit Puzzle: Full SolutionsSolve the We Were Here Tomorrow circuit puzzle with component matching tips, the GEN cable route, and door unlock steps. Get both players moving again.
More in Puzzles
We Were Here Tomorrow Crystal Puzzle: Laser Solution
Solve the We Were Here Tomorrow crystal puzzle with the correct laser order, identify Pingosius Crystalis, and fix the Wrong Crystal Configuration error.
We Were Here Tomorrow Floppy Disk Puzzle: Door Guide
Solve the We Were Here Tomorrow floppy disk puzzle with steps for disk activation, both direction panels, timing fixes, and the Green Key Card printer.
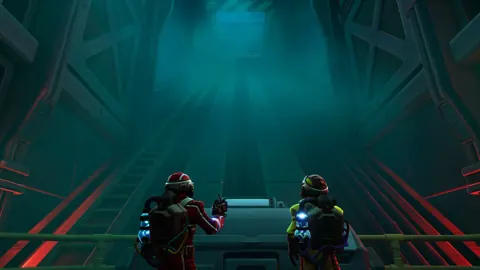
We Were Here Tomorrow Generator Puzzle: Full Solution
Solve the We Were Here Tomorrow generator puzzle with the full cable route, colored door unlocks, and symbol panel inputs. Get your co-op run moving again.
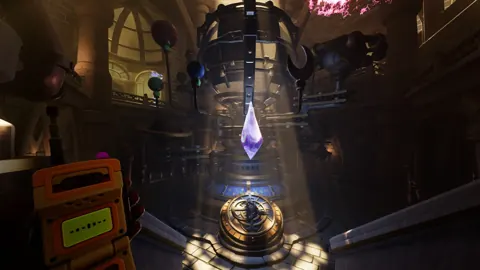
We Were Here Tomorrow Laser Puzzle: Crystal Solution
Solve the We Were Here Tomorrow laser puzzle with the correct crystal order, yellow-to-turquoise beam route, and fixes for Wrong Crystal Configuration.
Join the community
Official channels for news, updates and player help: